Text Editor
Click on a section title to jump down the web-page:
A. Introduction
1. The text editor box appears in the Content block sidebar for Text, Image with Text, and Image (for image captions, with limited functions).
2. The text editor has many features for formatting text and inserting special features. These are accessed through the icons in the top bar.
B. Text-formatting functions: For all of these functions, use the mouse cursor to select the text you wish to format.

- Undo / Redo: Click the left button to undo the previous action(s); click the right button to redo the previous action.
- Paragraph: Click the drop-down list to choose a style for the highlighted text. You have a choice between Paragraph (used for normal text) and four heading styles. The heading styles are very effective at highlighting the title of a section of text below. The sizes for each heading style are as follows:
-
Heading 1
-
Heading 2
-
Heading 3
-
Heading 4
-
- Styles: Under development.
- Size: Click the drop-down list to choose a font size. In general, it is best to keep the default font size and only change it by applying a style as in #2 above.
- Click these buttons to make the text bold, italics, underline, or
strikethrough. You can also change the color. - Click these buttons to make the text subscript or superscript.
- Click this button to remove all formatting from the selected text. This is highly recommended if you are pasting into this text editor from an external program like Word.
- Click this buttons to decrease the indent of the selected text. Click the first button on the next row to increase the indent.
- Click the drop-down list to left-justify, center, or right-justify the selected text.
- Click this button to create a hyperlink from the selected text. See Section C below.
- Click this button to insert an anchor link. See Section E below.
- Click on these icons to turn the selected text into a numbered or bulleted list.
- Click this icon to format the selected text as a quotation block.
- Click this icon to create an expanding text block. See Section F below.
- Click the button to insert a horizontal line.
- Click the drop-down to open a selection of special characters to insert.
- Click this button to make the selected text read left-to-right or right-to-left.
- Click the drop-down to find and/or replace text within the text editor.
- Click this button to toggle spellcheck on (blue) or off (black).
A hyperlink is text which has been configured to navigate to other parts of the website – or to another website altogether – when clicked on. Images may also be configured as hyperlinks. See Page content - images for instructions.
- Write a line of text which you will use for the hyperlink.
- Highlight the line of text.
- Click on the hyperlink icon.
- The Link task box opens.
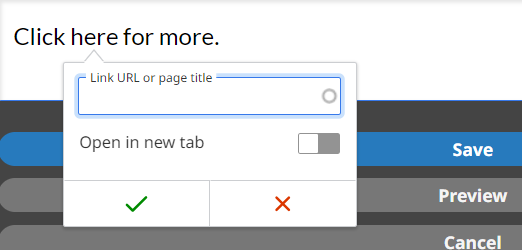
- Complete the field Link URL or page title.
- For an external website, copy the entire URL for the page and paste it in the field.
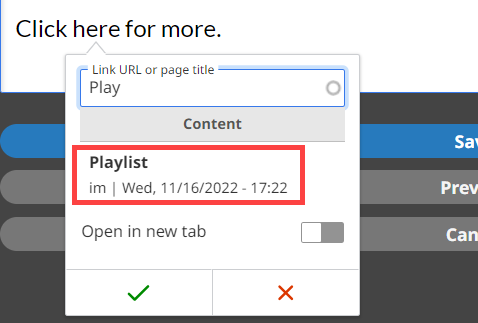
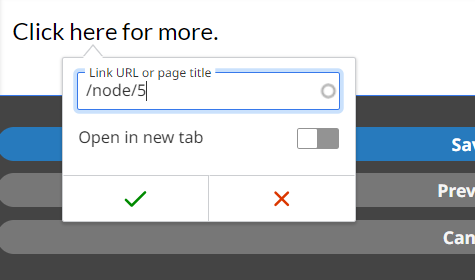
- To link to a page on the website, start typing the page title in the field. A list of pages that begin with those letters will appear below. Click on the correct page and the internal page ID will be entered in the field.
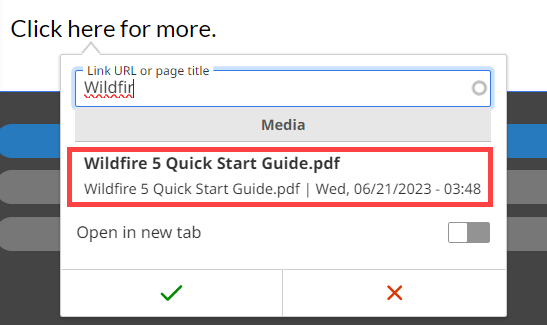
- To link to a file on the website which may then be downloaded, start typing the filename in the field. Click on the correct file and the internal file ID will be entered in the field.
- Note: You will see both pages and files when typing in the field. Pages are listed under the heading Content, and files are listed under the heading Media.
Link to a page

Link to a file

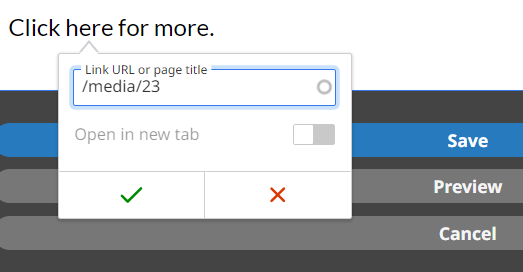
- Click the slider next to Open in new tab if you want the link to open in a new tab. This is preferred if you are linking to an external website, so that the website visitor still has your website open.
- Click the green check mark to complete the hyperlink.
D. Insert a button link
Sometimes it might be helpful to make linked text more obvious, so a button can be used within a text content block. First a link must be created, and then the link can be made into a button.
- Create a text hyperlink as in Section C above.

- Single-click on the link in the text editor box. Now click the Styles drop-down box and select the Button link from the text editor toolbar.

- A preview of the button appears in the text box and on the left side of the page. Click inside the button to edit the button text, if desired.

An anchor link is a special type of hyperlink that functions like a bookmark. It can bring the website visitor directly to a certain part of a website page. Inserting an anchor link is a two-part process. First, you must place the "anchor" where you want to bring the website visitor. Next, you will create the link to it.
Place the anchor
- Place the cursor at the beginning of the word or section where you want to bring the website visitor. Click on the Anchor icon in the text editor toolbar.
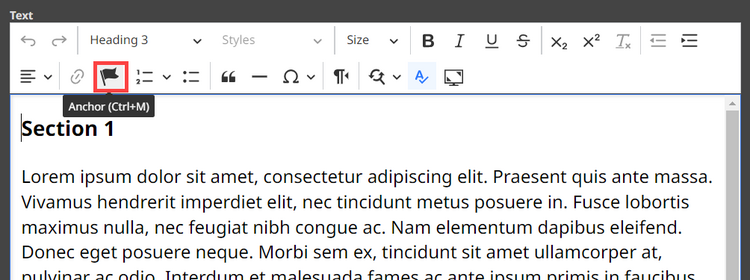
- A pop-up window appears. Give the anchor a name. It can be just a number or letter, or it can be the title of the section to which you are linking. Click the green checkmark when you are done.
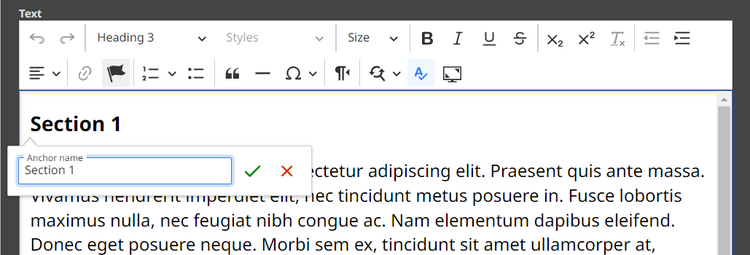
- You now see an indicator of where the anchor has been placed as well as the title of the anchor. The website visitor will not see this text.

Create the anchor link
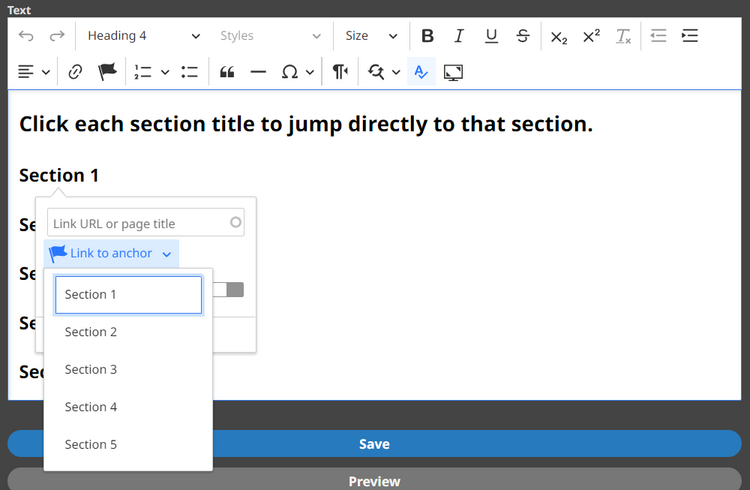
- Go into the text editor in the section where you want to create the anchor link. Highlight the text that will become the link and click on the hyperlink icon in the text editor toolbar.
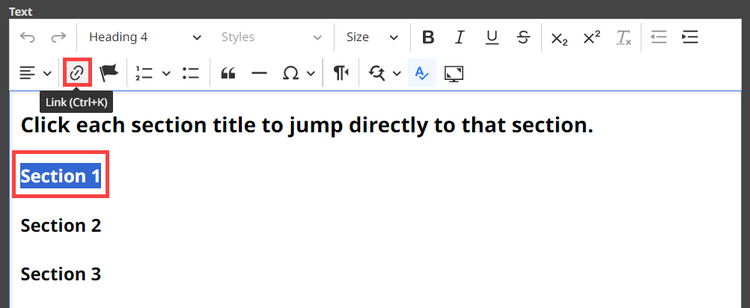
- Click the drop-down arrow next to Link to anchor. Select the correct anchor link from the anchors you have already created. Click the green checkmark when you are done.
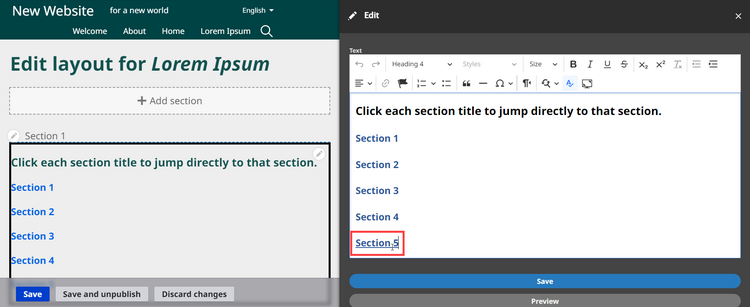
- Repeat these steps for all of the other anchor links you need. When you are done, you will see in the preview on the left that the anchor links are blue, just like other hyperlinks. Also, in the text editor box the anchor link is underlined when the cursor is placed over it, just like other hyperlinks. Click the Save button for the text editor and then again to save the page.
You may want to hide some of your text content and only show the beginning of it. The rest may be seen if the website visitor clicks to read more. This is helpful when your text content is important but long, and you want to conserve space on your page.
To apply this feature, first edit the text content block which contains the text you want to hide.

Click the Read More button, and a special box will appear in the text editing box.
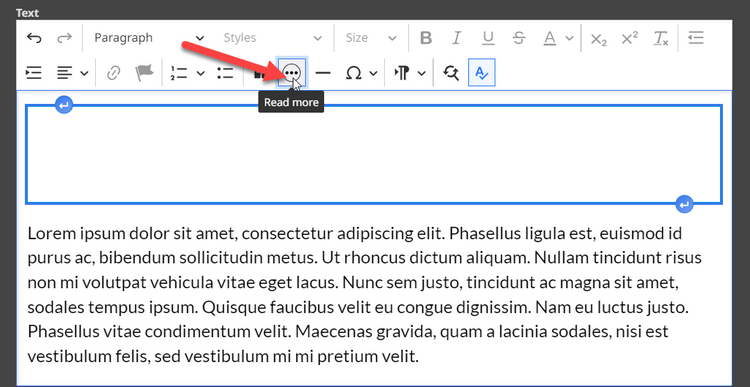
Everything that goes in the special box will be hidden by default. Click the blue Enter icon at the top left of the box to insert a space above the box, so you can put your first portion of text there. Then copy the rest of your text inside the box.
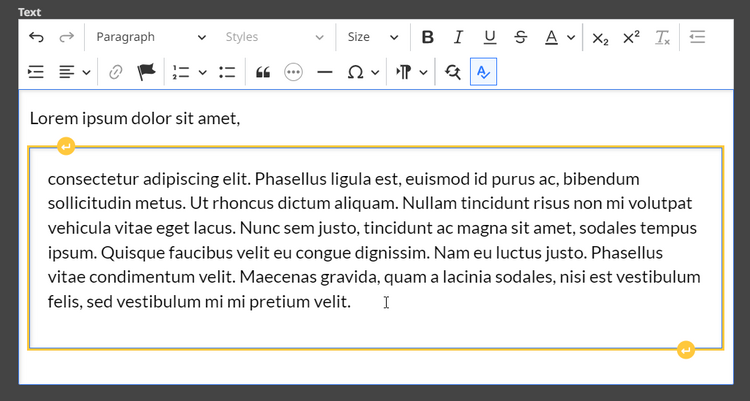
Click the blue Save button to save the text content block, and then click the blue Save button to save the page as well. Now the text has been hidden and will only be seen if the website visitor clicks to read more.

